

How to Setup 3rd party Domain on Blogger
with Godaddy.com
1. Login to your Godaddy account and click on
the DNS drop down menu.

3. Under the title Domain search box give your desired domain name, you will see all your domains select which you are going to setup, Then go ahead.
 4. You
will be directed to above page here you can add Type A and CNAME of your
blog. In the mean time open your blogger account and go to Settings and go to
basic sub section,
4. You
will be directed to above page here you can add Type A and CNAME of your
blog. In the mean time open your blogger account and go to Settings and go to
basic sub section, 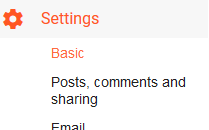
You can find Publishing (Blog Address). Click on + Setup a 3rd party URL for your blog.


7. Copy ghs.google.com and go to domain registered website. Click ADD CNAME in type www in name column, paste ghs.google.com in value/ or host column, select any timing in TTL but default is 1 hour. Like wise you will be entering second CNAME, follow the same procedure but in Name column give what is shown in your blog under (Name, Label or Host) just below www. In Host/ or Point to enter what is given in your blog under (Destination, Target).

216.239.34.21
216.239.36.21
216.239.38.21
 That’s it you will get no errors see the above picture. Now you don't always have to
use old Blogspot long URL name. Blog URL will be redirected to your newly purchased domain
name (ex: www.servicebloggers.com)
That’s it you will get no errors see the above picture. Now you don't always have to
use old Blogspot long URL name. Blog URL will be redirected to your newly purchased domain
name (ex: www.servicebloggers.com)
If your domain is registered with a company
other than Blogger, follow the instructions below to create ADD type A and
CNAME record in the domain registered network. This will be processed with in
about 12 hours for newly purchased domains.
Custom domain setup in Blogger.com
is used to create your own blog URL. (for example: converting from myusefulblog.blogspot.com
to usefulblog.com).
When you purchase a domain from Godaddy.com,
they automatically assign an IP address (Type A and CNAME record) for the
registered domain. Here, you have to change those records which is given in
your blogger account under settings of your blog. The step by step procedure
for setting up your domain for your blog is shown below with picture for easy
understanding. This post can help you to change the A and CNAME records of your
Godaddy account.
Carefully
follow the steps one by one:

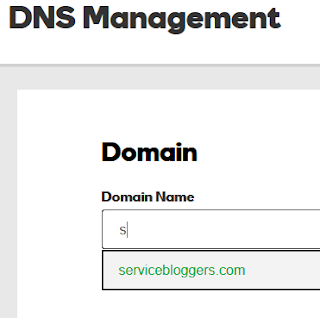
2. Under DNS, you will see
the above lists. Click on Manage Zones from drop down menu. You’ll be
directed to the DNS Management page.

3. Under the title Domain search box give your desired domain name, you will see all your domains select which you are going to setup, Then go ahead.

You can find Publishing (Blog Address). Click on + Setup a 3rd party URL for your blog.

5. Enter in your purchased domain
name www.example.com then click save.

6.
Error 32. We have not been able to verify your authority to this domain. Which
means There is no redirecting link and hosting name of your blog updated in the
domain registered website. Will pops up as shown in below picture with
instruction and details of your blog. Every individual blog has an individual
Destination link. So, don’t copy the example picture.


7. Copy ghs.google.com and go to domain registered website. Click ADD CNAME in type www in name column, paste ghs.google.com in value/ or host column, select any timing in TTL but default is 1 hour. Like wise you will be entering second CNAME, follow the same procedure but in Name column give what is shown in your blog under (Name, Label or Host) just below www. In Host/ or Point to enter what is given in your blog under (Destination, Target).
8. Now you will have to ADD Type
A. Click ADD in your domain website. Click A in Type Column, @ in
name Column under value enter IP address as given below one after one. Like
that enter total 4 IP address of Blogger. After Adding all 4 IP address 1 by 1
save this settings.
216.239.32.21216.239.34.21
216.239.36.21
216.239.38.21
This is how you can change the
existing domain IP address that now points to your Blogger IP address.
Wait for few hours for the changes to take effect in your IP records. After
that go to your blogger settings page click again + Setup a 3rd
party URL for your blog. Now enter in your domain name and click save.


0 Comments